
Can You Pierce Your Ear With an Earring? The Risks Explained
You can pierce your ear with an earring, but you absolutely should not. It’s a blunt instrument that tears tissue instead of cutting it, dramatically raising the risk of infection, jagged scarring, and improper placement. A proper piercing uses a single-use, sterilized hollow needle that creates a clean channel for the jewelry.
Most people think the risk is just infection from a dirty pin. The real danger is the physical trauma. A sharp earring post is still a wedge, not a blade. It forces its way through, crushing cells and leaving a wound that heals poorly.
This guide walks through why that earring in your hand is the wrong tool, what a professional actually uses, and how to care for a piercing so it heals without a trip to the doctor.
Key Takeaways
- An earring post is a blunt object that tears flesh, causing more trauma and a higher infection risk than a sharp, hollow needle.
- Professional piercers follow the Association of Professional Piercers guidelines and use single-use, sterilized needles and implant-grade jewelry you cannot source at home.
- Earlobe piercings take 6–8 weeks to heal; cartilage can take 6–12 months. Skipping aftercare resets the clock.
- If a piercing closes, do not force jewelry through. A professional can use a taper to reopen it if the channel is still there.
- Hypoallergenic metals like implant-grade titanium, niobium, or 14k/18k gold are mandatory for new piercings to avoid allergic reactions.
Why an Earring Post Is a Bad Piercing Tool
It looks sharp enough. The point seems fine. The problem is physics. A standard earring post is a tapered cylinder. It displaces tissue by force. A hollow piercing needle is a surgical-grade blade that cuts a clean, circular channel.
A 2008 histological study published in the Journal of Plastic, Reconstructive & Aesthetic Surgery compared piercing methods on ear cartilage. It used a 16-gauge BD Insyte-W intravenous catheter needle against spring-loaded guns like the Caflon and Blomdahl models. The study concluded all methods caused the same extent of histological damage to cartilage, but noted the needle created a cleaner wound channel with less surrounding tissue crush.
The earring post doesn’t cut. It rips. That crushed tissue becomes a larger, more inflamed wound. It bleeds more. It swells more. The jagged edges of the tear are perfect breeding grounds for bacteria, which is why DIY piercings with earrings or safety pins have such high infection rates. Your body has to work harder to rebuild from a crush injury than from a clean cut.
TL;DR: An earring post tears flesh; a needle cuts it. The torn wound heals slower and gets infected more often.
The Blunt-Trauma Mechanism You Can’t See
Under a microscope, the tip of a safety pin or an earring is a dull wedge. When you push it through skin, it doesn’t slice. It bludgeons cells apart. The Mayo Clinic piercing safety guide warns that improper tools increase infection risk and tissue damage.
Think of punching a hole in paper with a nail versus tearing it with a pencil. The nail leaves a clean hole. The pencil shreds the edges. Your earlobe is that paper. The shredded edges take longer to knit back together, and they often heal as raised, hypertrophic scars or keloids. That’s the bump you see months later on a botched DIY job.
Sterility Is the Second Impossible Hurdle
You can boil an earring. You can soak it in alcohol. You cannot sterilize it to the level required for a surgical procedure in a home environment. Autoclaves use pressurized steam at 121°C (250°F) for a minimum of 30 minutes to kill all microbial life, including bacterial spores.
Home methods don’t reach that standard. Residual bacteria get shoved deep into the wound with the post. The result is an abscess that forms a week later, often requiring antibiotics and leaving permanent scar tissue. A professional studio’s autoclave and single-use needle eliminate this variable entirely.
Common mistake: Sterilizing an earring with rubbing alcohol and thinking it’s safe, alcohol doesn’t kill all spores, and it evaporates before the piercing, leaving the post non-sterile. An infection seeded this way appears 5–7 days later as throbbing pain, redness, and pus.
The Professional Piercing Process
A professional piercing is a minor surgical procedure. It happens in a controlled environment with tools you cannot buy at a pharmacy. Knowing what happens demystifies it and shows why the corner store kiosk with a gun is also a bad choice.
First, the piercer will consult with you about placement. They use a surgical marking pen to place a dot. You check it in a mirror. This step alone prevents countless crooked piercings. They then open a sealed, single-use pack containing a hollow needle, the jewelry, and all the tools needed for your single piercing.
The needle is typically 16g or 18g (1.2mm or 1.0mm in diameter), slightly larger than a standard earring post to allow for swelling. The piercer wears sterile gloves, cleans the area with a surgical scrub, and uses a clamp to stabilize the lobe. The needle goes through in one swift, controlled motion. You feel a quick pinch and pressure, but not the prolonged burn of forcing a blunt object.
The jewelry is attached to the needle’s trailing end and follows it through the fresh channel. The entire transfer happens without exposing the wound to air. The piercer secures the jewelry, gives you detailed aftercare instructions, and sends you home with a care sheet. The Cleveland Clinic ear piercing guide outlines this expectation for a standard clinical visit.
Piercing Gun vs. Needle: The Real Showdown
Piercing guns are common in mall kiosks and some clinics. They use a spring-loaded mechanism to drive a sharpened earring stud through the lobe. The APP’s position is clear: they are not suitable for any piercing procedure.
| Aspect | Single-Use Hollow Needle | Reusable Piercing Gun |
|---|---|---|
| Mechanism | Cuts a clean hole | Forces a stud through, causing blunt trauma |
| Sterility | Entire apparatus is single-use, autoclaved before packaging | Plastic gun cannot be autoclaved; only the stud cartridge is changed |
| Jewelry | Implant-grade, designed for healing | Often poor-quality, butterfly-back studs that trap moisture |
| APP Stance | Recommended | Not permitted by APP members |
| Best For | All piercings, especially cartilage | Not recommended for any piercing |
The gun’s speed is an illusion of safety. The stud is sharp, but the gun’s mechanism cannot be sterilized. Blood and tissue aerosolize inside the plastic chamber with each use. The APP states this clearly in its professional piercer gun safety warning. For lobe piercings, a needle is still superior. For cartilage, noses, or navels, a gun is dangerously inappropriate.
What to Do If You Already Tried It
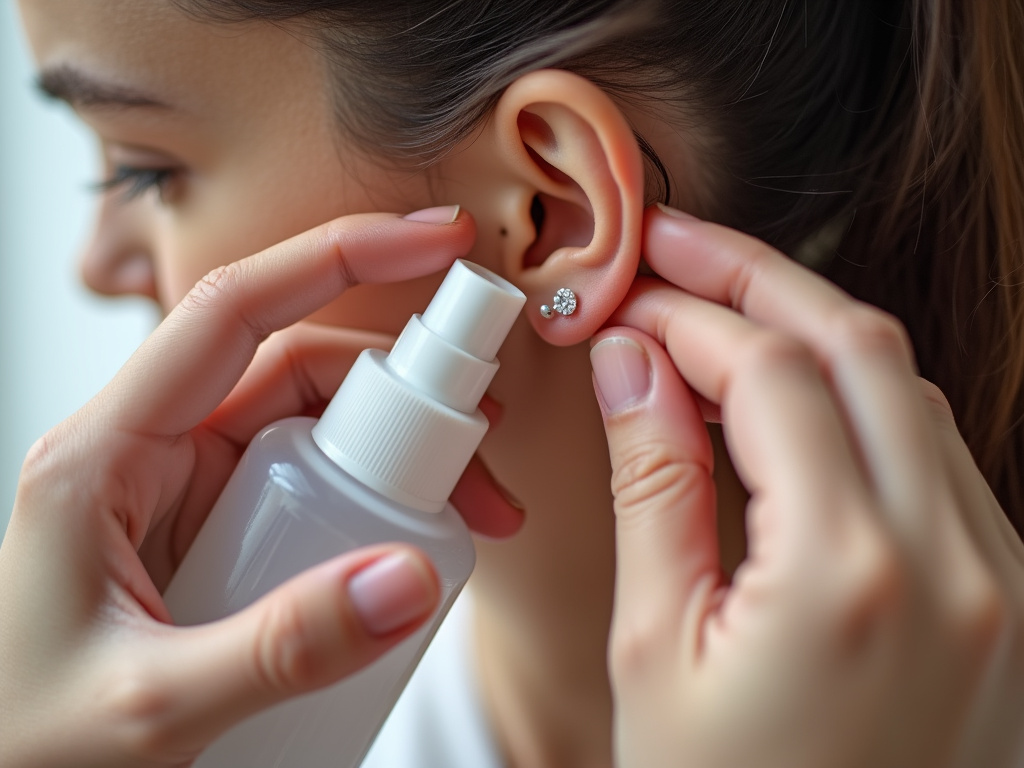
Maybe you did it as a teenager. Maybe a friend talked you into it last week. The immediate steps are the same: damage control.
First, do not panic and rip the earring out. You’ve made a wound. Removing the jewelry now can trap bacteria inside and cause an abscess. Leave it in place. Wash your hands thoroughly with soap and water. Prepare a sterile saline solution (you can buy wound wash spray) and gently clean around the entry and exit points twice a day. Do not use alcohol or hydrogen peroxide, they will damage the healing cells and slow everything down.
Watch for signs of infection: increasing redness, swelling that spreads beyond the immediate area, throbbing pain, yellow or green pus, or fever. If any of these appear, see a doctor immediately. Do not try to treat a deep tissue infection at home.
If the earring is in and the area is merely sore and red, you might get lucky. Follow a strict cleaning ear piercings routine with sterile saline for the full 6-8 week healing period. Once fully healed, you can replace the problematic earring with a proper hypoallergenic earring metals piece.
When the Hole Has Already Closed
If you took the earring out and the hole closed up, do not try to force anything back through. You will cause bleeding, re-injure the tissue, and likely introduce infection.
A professional piercer can assess it. If the channel hasn’t fully sealed, they might use a lubricated insertion taper to gently guide the jewelry back in. This is a precise tool, not a random earring. If the hole is fully closed with scar tissue, they will recommend letting it heal completely and then re-piercing it in the correct spot. Trying to repierce through scar tissue is harder and more painful.
This is a common issue, and a good piercer sees it weekly. Be honest about what you used. They need to know the starting point was a blunt object to gauge the potential damage.
The Right Tools and Jewelry for Healing
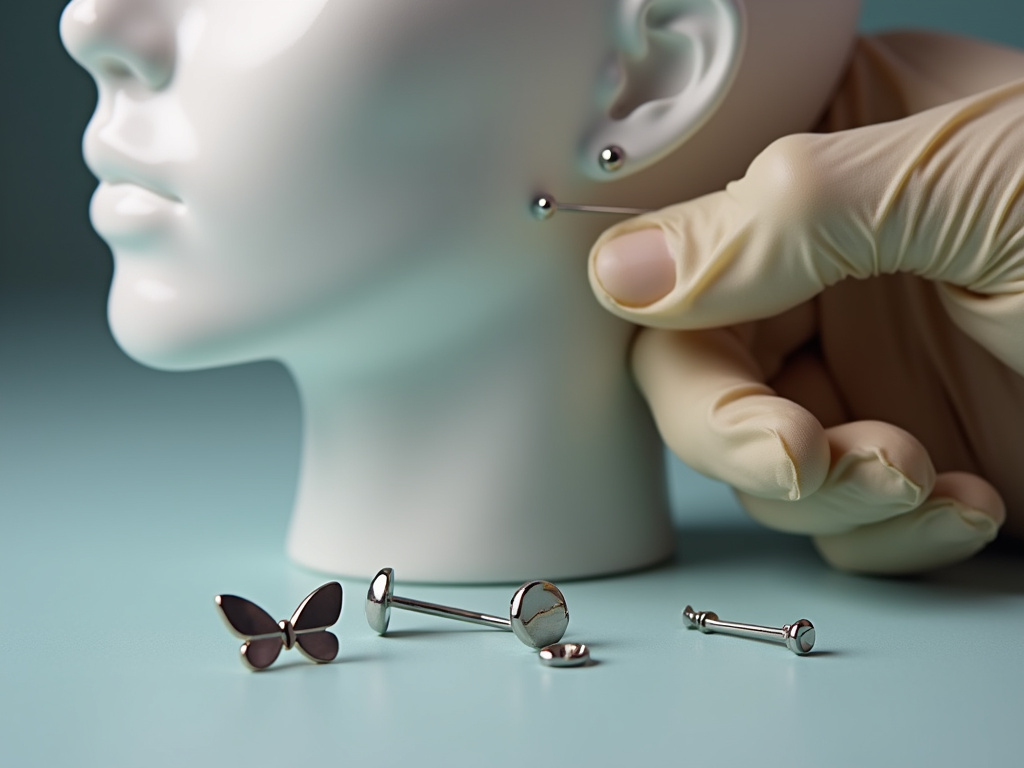
If you’re going to get a piercing, you need the right hardware from the start. The jewelry that comes with a piercing gun or that you’d use at home is almost always wrong for healing.
Implant-grade materials are non-negotiable. The Mayo Clinic specifies surgical stainless steel, titanium, niobium, or 14- or 18-karat gold as hypoallergenic options. Avoid anything labeled “surgical steel” without the “implant-grade” designation, and avoid plated metals. The plating wears off inside the healing fistula, exposing you to nickel or other irritants.
The design matters too. Initial jewelry should be a straight post or a captive bead ring, something with a smooth, polished surface that won’t harbor bacteria. Butterfly backs are terrible. They trap moisture, skin cells, and soap against the wound. They also press on the back of the lobe, restricting airflow and swelling space.
| Jewelry Feature | Good for Healing | Bad for Healing |
|---|---|---|
| Material | Implant-grade titanium, niobium, 14k/18k gold | Plated metals, nickel-containing stainless steel, “mystery metal” |
| Backing | Flat-back labret, ball-back, captive bead ring | Butterfly clasp, push-back |
| Surface Finish | Mirror-polished, seamless | Textured, matte, or porous |
| Aftercare Compatibility | Easy to clean around, doesn’t trap moisture | Hard to clean, creates crevices |
After the piercing heals, you can switch to other styles. But for the first few months, the jewelry is part of the medical device. Choosing the wrong one is like using a dirty bandage. For long-term care of your nicer pieces, a solid jewelry storage solutions system will prevent damage.
Piercing Aftercare That Actually Works
Aftercare isn’t a suggestion. It’s the protocol that determines whether your piercing heals cleanly or becomes a problem. The standard advice has shifted away from harsh chemicals.
Use sterile saline wound wash spray twice a day. That’s it. No twisting the jewelry. No using soap directly on it. No cotton balls that leave fibers behind. Spray it, let it sit for a minute, then gently pat it dry with a clean, disposable paper towel. Do not submerge it in pools, hot tubs, or lakes for the first two months.
Sleep on your back if possible, or use a travel pillow to keep pressure off a new ear piercing. Change your pillowcase frequently. Be mindful of hair products, phone receivers, and hats that might snag. The new ear piercing aftercare instructions from Cleveland Clinic emphasize this simple, non-invasive approach.
Healing timelines are fixed by biology, not impatience.
– Earlobes: 6–8 weeks minimum.
– Cartilage: 6–12 months, sometimes longer.
If you change the jewelry before the fistula has fully formed internally, you will cause micro-tears and set healing back by weeks. A good sign it’s healed? No crusties, no tenderness, and the jewelry moves freely without pain.
The Signs of Trouble
Knowing when to call a professional is part of aftercare. Normal healing involves some redness, slight swelling, and clear or whitish discharge that dries into “crusties.” This is lymph, not pus.
Common mistake: Mistaking normal lymph fluid for infection and over-cleaning with harsh chemicals, this dries out and irritates the piercing channel, delaying healing by 2–3 weeks.
Real infection signs are a different league: redness that spreads, swelling that feels hot and hard, throbbing pain that doesn’t subside, and yellow or green pus that smells bad. Fever is a major red flag. If you see these, do not remove the jewelry. Removing it can trap the infection inside. See a doctor.
Allergic reactions look different: itchy rash, dry flaky skin, and redness localized just around the metal contact points. If this happens, you need to switch to a truly hypoallergenic metal like implant-grade titanium. Our guide on skin discoloration from jewelry explains the chemistry behind these reactions.
Frequently Asked Questions
Can I use a sewing needle to pierce my ear?
You can, but you shouldn’t. A sewing needle is sharper than an earring but still not sterile, not hollow, and not designed for the job. It will still cause more trauma than a piercing needle and carries the same infection risks. The result is often a crooked hole.
Is it cheaper to pierce your own ears?
In the short term, maybe. The cost of a professional piercing ranges from $30 to $80 per ear, including jewelry. The cost of a DIY infection, doctor visits, antibiotics, potential scar revision, easily runs into hundreds of dollars. It’s the least expensive body modification you can get done professionally.
How can I tell if my piercing is infected or just irritated?
Irritation is localized: redness and tenderness right around the hole, with clear or whitish discharge. Infection spreads: redness radiates out, swelling increases, pain throbs, and discharge is thick, yellow/green, and foul-smelling. Fever means infection. When in doubt, see a professional.
What’s the best metal for a new piercing to prevent a reaction?
Implant-grade titanium is the gold standard. It’s nickel-free, lightweight, and highly biocompatible. Niobium and 14k or 18k gold are also excellent choices. Avoid surgical steel unless it’s specifically ASTM F138 implant-grade, and avoid anything plated. For cleaning these metals later, follow our gentle gold cleaner or surgical steel cleaning guides.
Can I pierce my cartilage with an earring?
Absolutely not. Cartilage is dense, avascular tissue with little blood flow. Healing is slow and finicky. A blunt earring post will shatter the cartilage, leading to a deformity called “cauliflower ear” and a high risk of perichondritis, a severe infection that can permanently damage the ear’s structure. Only a professional with a needle should attempt cartilage.
How do I clean the earring I want to wear after it’s healed?
Once the piercing is fully healed (no tenderness, no discharge for several weeks), you can switch jewelry. Clean new earrings before wearing them. For daily wear pieces, a regular earring hygiene practices routine keeps them sanitary. Soak them in warm water with a drop of mild dish soap, scrub gently with a soft toothbrush, rinse, and dry thoroughly.
Before You Go
Piercing your own ear with an earring is a gamble with poor odds. The tool is wrong, the environment isn’t sterile, and the aftercare knowledge usually isn’t there. The few minutes and dollars you save aren’t worth the weeks of healing complications or the permanent scar.
Find a professional piercer who uses single-use needles and implant-grade jewelry. Follow their aftercare instructions to the letter. It’s a one-time procedure, doing it right the first time means you get to enjoy a lifetime of wearing earrings without the headaches. And when you’re ready to switch to those beautiful heirloom pieces, you’ll have a clean, well-healed hole to put them in. For everything that comes after, from tarnished silver jewelry to fashion jewelry cleaning, we’ve got you covered.
