
How to Adjust a Watch Bracelet by Matching the Pin Direction
To adjust a watch bracelet, you need to remove links by pushing out the connecting pins in the direction indicated by small arrows on the links, then reassemble the bracelet and use the clasp’s micro-adjustments for a perfect fit. The process requires a link removal tool, a flat surface, and careful attention to pin orientation.
Most people start pushing pins without noticing the tiny directional arrows stamped on the links. They force the pin the wrong way, flare the end, and ruin a perfectly good bracelet. The pin won’t go back in. Ever.
This guide walks through identifying your bracelet type, reading those arrows correctly, and using a micro-adjustment clasp without over-stressing it. You’ll have the right fit in about fifteen minutes.
Key Takeaways
- The small arrows on the links show which way to push the pin out. Ignoring them jams the mechanism.
- Always remove an equal number of links from each side of the clasp to keep it centered on your wrist.
- Folded link bracelets (common on Seiko 5 watches) require more force and a specific technique to clear a small internal nub.
- Micro-adjustments on the clasp are for fine-tuning, not for compensating for a full link’s worth of slack.
- After reassembly, test the bracelet’s flexibility. If it’s stiff, a pin is likely not seated flush.
The Tools You Already Own (Probably)
You don’t need a professional watchmaker’s kit. A basic link removal tool, often included with aftermarket bracelets, is the main requirement. The cheap, all-metal ones work fine. You’ll also use a small flathead screwdriver for screw-type pins and a pair of tweezers or needle-nose pliers to handle the tiny pins and collars. A soft cloth or a watch mat protects the finish from scratches.
This 50–60 word technical snippet covers the essential toolset for watch bracelet adjustment. The link removal tool must align precisely with the pin axis. A soft work surface prevents accidental damage to the crystal or polished links. Proper tool alignment prevents the pin tip from mushrooming, which makes reinsertion impossible without damaging the link hole.
The wrong surface ruins the job. I once worked on a polished oyster bracelet directly on a granite countertop. One slip with the tool and a two-inch scratch appeared down three links. Now I always use a microfiber cloth folded into quarters. It provides enough cushion and keeps everything from sliding.
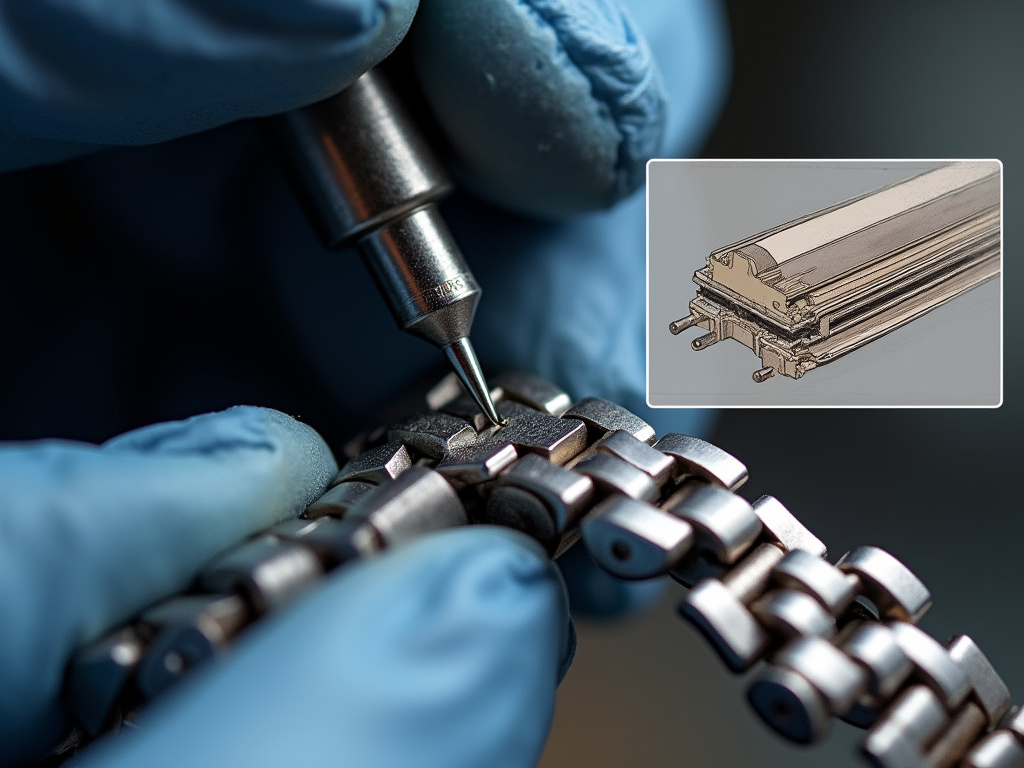
The Crucial Step Everyone Skips: Pin Direction
Find the small arrows engraved on the underside of the links. They point in the direction you need to push the pin out. On most modern bracelets, like those from Citizen or Seiko, the arrow points from right to left when the watch is facing you. You must push the pin from the arrow’s tail toward its point.
| Pin Type | Tool Needed | Direction Rule | Risk If Ignored |
|---|---|---|---|
| Straight Push Pin | Link removal tool | Push in direction of arrow | Pin end flares, jams in link, ruins hole |
| Screw Pin | Precision screwdriver | Unscrew counter-clockwise | Stripped screw head, irreversible damage |
| Folded Link Pin | Link removal tool & more force | Push opposite the bracelet’s fold | Pin snaps or deforms the folded metal |
Common mistake: Pushing a pin against the arrow’s direction — the pin’s tapered end catches inside the link, flares, and locks itself in place. You’ll need a drill to remove it, which destroys the link.
The physics are simple. The pin has a slightly narrower tip. Going the right way lets that tip slip out cleanly. Going the wrong way jams the wider shoulder of the pin into the smaller exit hole. That’s when you feel the sudden, destructive crunch.
I forced a pin the wrong way on a Hamilton bracelet. The crunch was audible. The pin flared, seized inside the link, and I had to cut the link off with a Dremel. Now I double-check the arrow every single time.
TL;DR: Arrows point the way out. Push from right to left if that’s what they show. Any resistance means stop and check direction.
A Practical Walkthrough: Removing Your First Link
- Determine the fit. Wear the watch and note the excess. Pinch the loose links. A good fit allows one finger to slide snugly between the bracelet and your wrist. Plan to remove the same number of links from each side of the clasp. This keeps the clasp centered under your wrist.
- Locate the removal arrows. Turn the bracelet over. The arrows are on the link’s inner surface, usually near the clasp. Links closest to the clasp are typically the ones you remove.
- Set up your workspace. Lay the soft cloth down. Have your removal tool, screwdriver, and tweezers ready. Position the bracelet so the link you’re working on is flat and stable.
- Align and press. Adjust the height of your removal tool’s fork so it centers on the pin. Align the tool’s pusher tip perfectly with the pin’s center. Press firmly and steadily in the direction of the arrow. The pin should slide out. If it’s a screw pin, use the screwdriver and turn counter-clockwise.
Skip this, and the pin will not exit cleanly. You’ll damage the tool, the pin, and the link. - Capture the parts. As the pin releases, have your fingers ready to catch it and any separate collar or sleeve. These parts are tiny and will vanish on a hard floor.
- Remove the freed link. Once the pin is out, the link will separate. Set it aside.
- Reassemble the bracelet. Connect the two bracelet ends. Insert the narrow tip of the pin into the hole, this time going opposite the arrow direction. Use the tool to push it flush. Ensure both ends of the pin are seated evenly.
The first link is the hardest. After that, the rhythm is quick. Just keep all the tiny parts organized.
Folded Link Bracelets: The Extra Force Required
Common on entry-level automatics like the Seiko 5, folded link bracelets look solid from the top but are hollow inside. The process is similar, but the construction demands more care. You must get the pin past an internal folded seam or “nub” within the link.
Common mistake: Applying standard pressure to a folded link pin — the pin hits the internal fold and stops. Increasing force at this point can snap the pin or bend the soft folded metal, creating a permanent weak spot.
You’ll feel a distinct two-stage resistance. The first is the pin moving through the outer link wall. The second, firmer stop is that internal fold. A firmer, sustained push is needed here. Don’t jerk. Just lean into the tool with steady pressure. The pin will pop past it and release.
Why-layer: Folded links are made from a thin strip of metal folded into a box shape. The pin must pass through this folded seam, which is a double layer of metal. That’s why it requires significantly more force than a solid link.
When to Use the Micro-Adjustment Clasp (And When Not To)
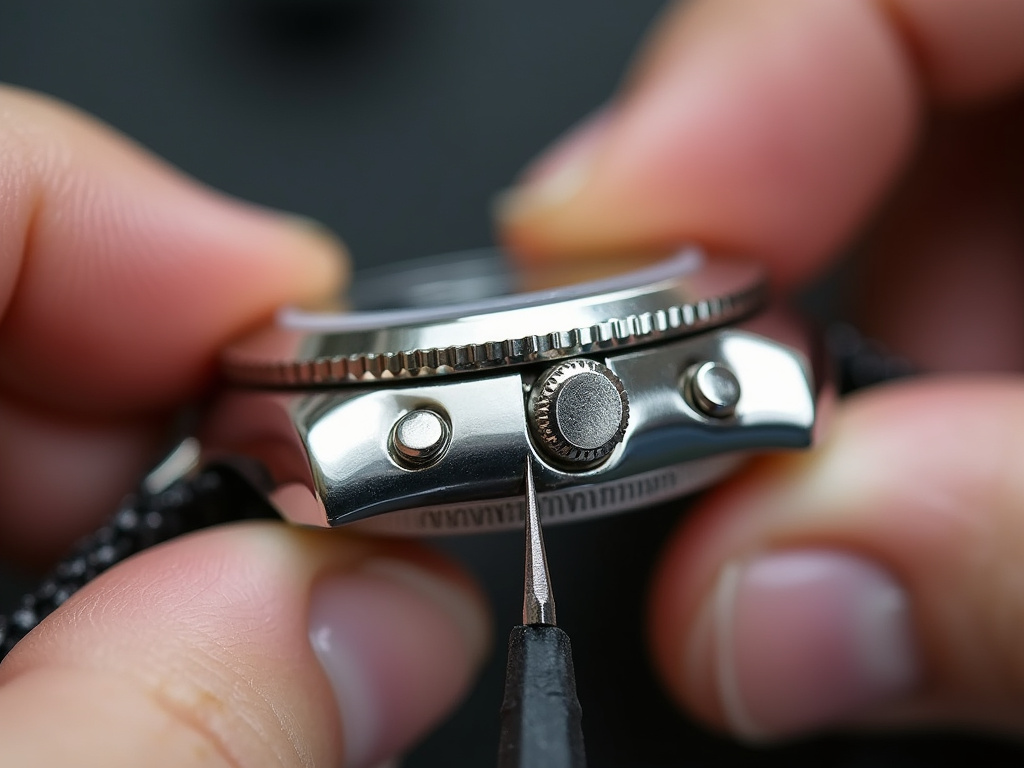
Most modern bracelets have a clasp with multiple setting holes. This micro-adjustment is for fine-tuning, not for fixing a bad link removal job. If your bracelet is still too loose after removing what seems like the right number of links, use these holes to take up the last few millimeters of slack.
Here’s how to use it:
1. Find the small pins on the inside of the clasp.
2. Use a tool or your fingernail to press them inward.
3. Slide the clasp tongue to a new position.
4. Release the pins to lock it in place.
I won’t recommend using the tightest micro-adjustment setting as a permanent fix. It puts asymmetric stress on the clasp spring bar. Over months, that can fatigue the metal and cause the clasp to fail open. Remove another half-link if you can.
TL;DR: Micro-adjustments are for fine-tuning comfort after a proper link removal. Relying on them for a major size adjustment wears out the clasp mechanism.
Why Does My Bracelet Feel Stiff After Sizing?
If your bracelet doesn’t drape naturally after reassembly, a pin is likely not seated all the way. Each pin end must be perfectly flush with the outer link surface. A protruding end catches on the adjacent link, creating a hinge point that feels stiff and gritty.
Lay the bracelet flat and watch the links as you bend it. The stiff spot will be obvious. Use your tool to gently press the pin at that joint again. Often one more firm click seats it fully. If that doesn’t work, you may need to remove the pin entirely, inspect it for damage, and reinsert it.
For ongoing care after sizing, regular cleaning maintains comfort. A simple routine for stainless steel jewelry care keeps your bracelet looking sharp. If your piece is a different metal, like silver, our guide on silver jewelry care covers the specifics. Proper gold jewelry care is also essential for plated or solid gold bracelets. For a comprehensive overview, start with general jewelry cleaning.
Proper storing your jewelry on a soft roll or in a dedicated box prevents scratches on your newly adjusted bracelet. For long-term shine, incorporating tarnish prevention tips into your routine is key. If tarnish does appear, a gentle method like cleaning jewelry with baking soda can often resolve it without harsh chemicals.
Frequently Asked Questions
How many links should I remove from a watch bracelet?
Remove an equal number from each side of the clasp. For a standard fit, most men’s watches require removing two to four links total. Try the watch on and pinch the loose links to count before you start.
Which way do the arrows point when removing links?
The arrows on the links point in the direction you must push the pin out. On most bracelets, when the watch is facing you, you push from right to left. Always follow the arrow.
Can I adjust a watch bracelet without a special tool?
Not reliably. A proper link removal tool centers the force on the pin and prevents slippage. Using improvised tools like pins or nails often scratches the bracelet and damages the pin heads.
What’s the difference between a solid link and a folded link bracelet?
Solid links are machined from a block of metal. Folded links are made from a thin sheet folded into shape, making them lighter and hollow. Folded links require more careful force when pushing pins past internal seams.
Why is my watch bracelet still loose after using all the micro-adjustments?
The micro-adjustments are for fine-tuning, not for compensating for a full link’s length. If you’ve used all the holes and it’s still loose, you need to remove another half-link or full link from the bracelet itself.
How do I know if I have screw pins or push pins?
Look closely at the link’s side. Screw pins will have a tiny slot on the pin head. Push pins will appear smooth. You can also consult your watch’s manual or the manufacturer’s website, like the Seiko Watch Corporation’s instruction sheets, for specific guidance.
The Bottom Line
A well-fitted watch bracelet shouldn’t spin around your wrist or leave deep red marks. Getting it right hinges on one detail: following the tiny directional arrows stamped on the links. Push the pin the wrong way, and you create a frustrating, often costly repair. Push it the right way, and the job is straightforward.
Remember to remove links evenly, use the micro-adjustments sparingly, and always work on a soft surface. Your watch will feel like a part of you, not a loose accessory. Keep it clean with regular routine jewelry maintenance and store it properly, and it will stay that way for years.