
How to Layer Jewelry Without Tangles or Clutter
How to layer jewelry like a stylist: start with three pieces in three distinct length zones, maintain at least a half-inch gap to prevent tangles, and let one metal dominate your mix. This creates a balanced, intentional look that elevates your everyday style.
When my grandmother let me play in her heirloom jewelry box, I’d layer every necklace she owned. The result was always a glorious, knotted mess. Decades later, after working with hundreds of pieces at TheJewelryNook, I’ve learned that beautiful layering isn’t about abundance, it’s about a few strategic choices.
This guide skips the vague advice. I’ll share the exact formulas I use to build client stacks, the specific mistakes I’ve made (and how to avoid them), and how to make your jewelry look curated, not cluttered.
Key Takeaways
- The foundational stack uses just three necklaces: an anchor at the collarbone, a textural contrast piece within an inch of it, and a longer, lighter chain for movement.
- To prevent tangling, enforce a minimum half-inch gap between necklace lengths. Identical lengths demand a connecting clasp.
- Mix metals intentionally by letting one color dominate (70% of the stack) and using the other as a deliberate accent.
- Visual weight, not just length, creates balance. Pair one substantial piece with several delicate ones.
- Layered jewelry requires twice the cleaning and separate storage to prevent accelerated tarnish and frustrating knots.
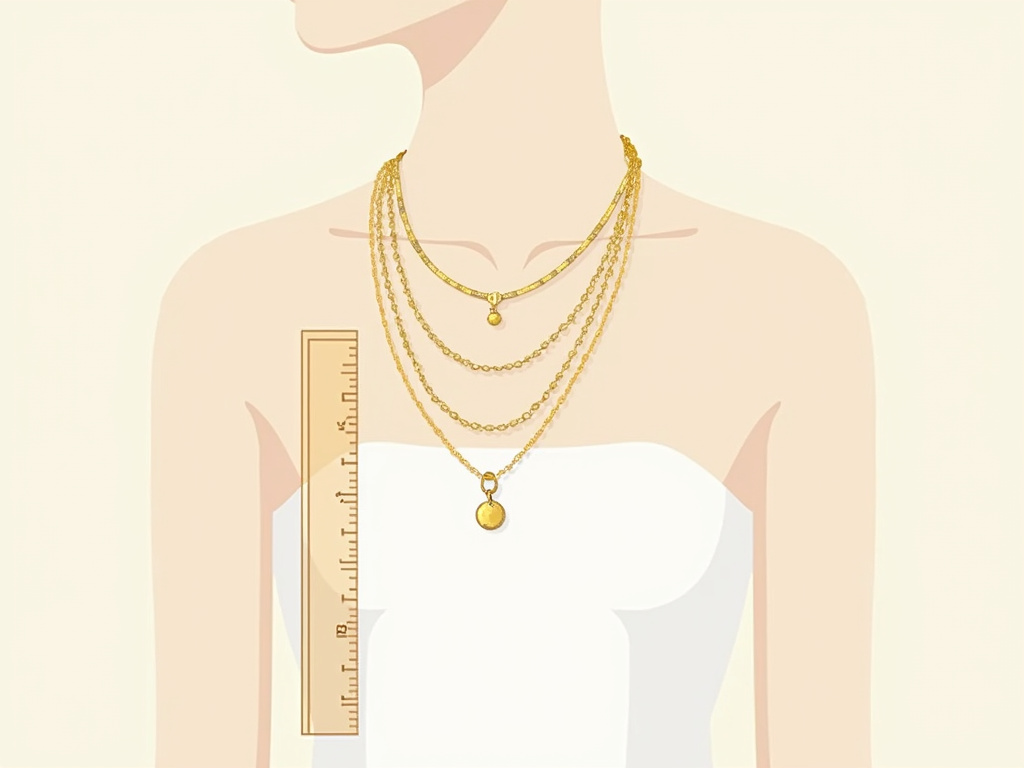
What’s the Easiest Way to Start Layering Necklaces?
Feeling overwhelmed is normal. My first client consultation always begins with the same three-step formula that works with any jewelry box. It builds a complete, polished look without guesswork.
First, pick your anchor. This is the piece you’d confidently wear alone, sitting at your collarbone (16-18 inches). It needs visual weight. A thin, dainty chain will disappear. I learned this after a client insisted on using a 1mm diamond-cut chain as her anchor; the longer, heavier layers below completely overpowered it, making the whole stack look accidental. Look for something with presence, a solitaire pendant on a 2mm chain, a chunky choker, or a design like a Tiffany T1 Smile necklace. Its job is to ground everything.
The anchor piece serves as the visual foundation of a necklace stack. It should possess sufficient mass and design interest to support additional layers without being obscured by them.
Next, add a textural contrast piece. It should sit within an inch of your anchor’s length, either just above or below. The goal is difference. If your anchor is a smooth pendant, add a hammered disk or a coin necklace. If it’s a bold chain, add a simple, thin cable chain. This contrast is what the eye reads as “layered” instead of “clumped.”
Your third piece is for length and movement. Aim for 24 inches or longer, a lariat, a long chain with a small charm, or delicate beading. Keep this one lighter in visual weight than your anchor. Its job is to elongate your silhouette and add a dynamic element. For everyday wear, this trio is your blueprint.
TL;DR: Build your first stack with a weighty anchor (16-18″), a textural contrast near it, and a light, long piece (24″+).
How Do You Choose Chains and Clasps That Layer Well?
Not every necklace is cut out for team play. Bulky clasps create lumps, and the wrong chain type is a tangling invitation. You need pieces engineered for cooperation.
Start with the clasp. That beautiful Mejuri Dôme Pendant comes with a 4mm lobster clasp that creates a noticeable bulge under a second chain. For layering, I source small 3mm spring ring clasps from suppliers like Rio Grande to swap them out, they lay flat. Barrel clasps or figure-eight clasps are even better, as they sit flush against the neck. Consistency matters; if all your layered necklaces have a similar, slim clasp style, the back looks as intentional as the front.
Chain type dictates your daily friction. My personal rule? I use 14k gold-filled cable chains from brands like Gorjana for base layers over gold-plated ones. The gold coating on gold-filled pieces is about 100 times thicker than standard plating. After two years of daily wear, my gold-filled chains show no wear-through from rubbing, while a plated accent chain in the same stack needed replating. For your foundational layers, stick to simple, low-tangle profiles.
| Chain Type | Best Use Case | Tangle Risk | Metal Integrity Note |
|---|---|---|---|
| Cable Chain | Everyday base layer | Low | Durable, simple construction. |
| Box Chain | Base or anchor layer | Very Low | Very stable, less surface area to catch. |
| Curb Chain | Statement anchor | Medium | Substantial weight can help prevent sliding. |
| Rope Chain | Solo statement piece | High | Beautiful but a notorious knotter. |
| Snake Chain | Delicate accent only | Very High | Prone to kinking and tangling. |
Finally, test pendant orientation. Drape a pendant over another chain on your dresser. Does it spin or sit face-up? Disc pendants and bezel-set coins are stable; dangling charms or asymmetrical designs often twist. An eye-catching piece like the Matelia Ring from ÉLARAMUSE works as a ring stack anchor because it’s designed to be a focal point, the same logic applies to necklaces.
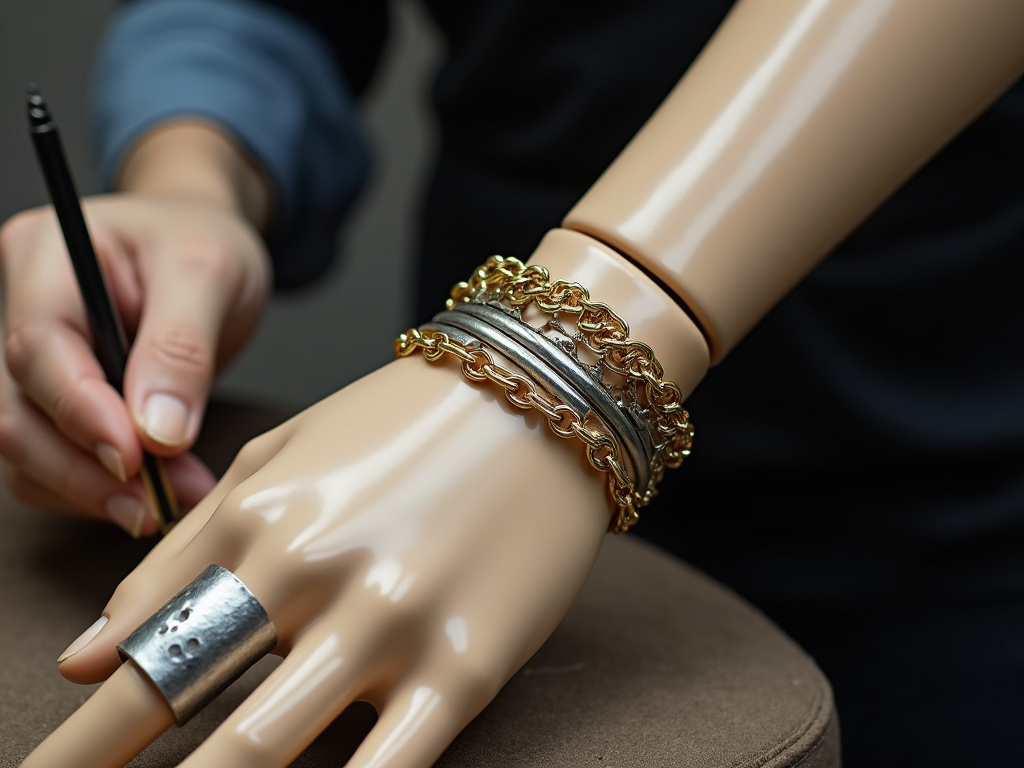
What Are the Rules for Layering Rings and Bracelets?
Your hands and wrists need a scaled-down version of the necklace rules. Here, movement and proportion are everything.
For rings, choose one focal finger. I once made the mistake of stacking rings on every finger for a meeting, the feedback was “distracting.” Now, I start with a statement piece on my middle or index finger, then flank it with simpler, thinner bands. Mixing widths is key; a wide signet ring looks balanced with two slim pavé bands on either side. This variation prevents the “knuckle armor” effect.
Common mistake: Stacking multiple rings of identical width on one finger, the result is a solid, bulky block instead of a nuanced collection. The fix is to mix at least two different band widths.
Bracelets follow the weight-and-texture rule. Pair one substantial piece, like a hinged bangle, with several delicate chain bracelets. Or, stack multiple thin, identical chains where the only difference is a tiny charm on each. Always mix materials, a leather wrap with metal chains, or beads with a cable bracelet. This breaks up the visual monotony and keeps the look light. Confine your stack to one wrist; two heavily adorned wrists compete.
TL;DR: For rings: one statement ring flanked by slim bands on one finger. For bracelets: mix materials, one heavy anchor with several delicate chains.
Is It Really Okay to Mix Gold and Silver?
The old taboo is dead, but haphazard mixing still looks messy. The trick is intentional imbalance.
Choose a dominant metal. Let it comprise about 70% of your stack. If your anchor and contrast piece are gold, your long chain can be silver. This ratio makes the silver look like a deliberate “pop” rather than a mistake. I used to be a silver purist, but inheriting my aunt’s chunky gold bracelet forced a experiment. Now, I often use brushed silver as an accent against polished gold, the texture difference softens the color clash.
Finish often matters more than color. A high-polish gold and a high-polish silver can visually fight because they’re both intensely reflective. Instead, pair a polished gold chain with a brushed, hammered, or matte silver piece. Vermeil (gold-plated sterling silver) is a fantastic bridge metal; it reads as gold but has a cooler base that can tie a mixed stack together seamlessly.
Your skin tone is a guide, not a law. If you have cool undertones but love gold, use it further from your face, in your bracelet or ring stack, and keep necklaces and earrings in silver or white gold. This subtle placement keeps you looking harmonious while honoring your preference. For a truly low-maintenance mix, consider integrating pieces made from tarnish-resistant jewelry like stainless steel or titanium.
How Can You Permanently Prevent Necklace Tangles?
Tangling is a physics problem, not bad luck. It happens when chains of similar length can freely rotate around each other. Eliminate the conditions, and you eliminate the knots.
The golden rule is a half-inch minimum gap. One inch is ideal. This means the standard 16”, 18”, 20” set is a tangle factory. I learned this gap rule the painful way: my grandmother’s 18-inch rope chain permanently kinked after a daily battle with a 17.5-inch snake chain. The repair cost more than the piece. Now, I space mine out: 16”, 18.5”, 21”. That half-inch is the difference between chaos and harmony.
If you love the look of equal-length necklaces, you must physically connect them. Use a multi-strand clasp or a necklace connector. Wearing two separate, heavy chains at the same length guarantees a day-long wrestling match. For a soft, connected look, two very delicate, lightweight chains (like 1mm cables) can cling together as one unit.
| Necklace 1 Length | Necklace 2 Length | Gap | Tangle Risk | Recommended Action |
|---|---|---|---|---|
| 16” | 18” | 2” | Low | Ideal spacing. |
| 18” | 20” | 2” | Low | Ideal spacing. |
| 16” | 17” | 1” | Medium | Monitor, may twist. |
| 18” | 18.5” | 0.5” | High | Use a stabilizer bar. |
| 16” | 16” | 0” | Very High | Must use a connector clasp. |
Embrace adjustable chains. That 2-inch extension on many pendants isn’t just for fit, it’s your fine-tuning tool for perfect gaps. You can also add a tiny jump ring to a clasp to shorten a chain by a critical quarter inch. Proper storage is your final defense; always keep layered pieces separate, using jewelry organization tips to maintain those perfect gaps even in the box.
How Should You Care for a Layered Jewelry Collection?
Layered pieces live a harder life. Constant friction accelerates tarnish and can wear through delicate platings. A proactive care routine is essential.
Clean layered jewelry twice as often as solo pieces. If you clean a standalone necklace monthly, clean your stack every two weeks. Why? Friction creates microscopic abrasions that trap skin acids. I neglected this with a sterling silver and brass layer; within a month, the brass left a permanent greenish shadow on the silver that polishing couldn’t lift. A soft jewelry cloth after every few wears removes oils. For a deeper clean, follow our guide on cleaning mixed-metal pieces, paying extra attention to contact points.
Storage is where the battle is won or lost. Tossing a stack into a box is an invitation for knots that can weaken chains. I store every necklace individually on a multi-hook stand or in soft pouches. This practice, the core of preventing necklace tangles, saves hours of frustration and protects your investments. For pieces with gemstones, remember that some require special gemstone jewelry care to avoid damage from chemicals or ultrasonic cleaners.
Common mistake: Storing layered necklaces together, they can form tight, damaging knots within 48 hours. Untangling often stresses clasps and chains, leading to premature breakage.
Be mindful of metal reactions. Sterling silver can cause costume jewelry to tarnish rapidly. If you must layer them, consider a clear protective coating on the fashion piece or keep them separated by a cloth in storage. For valuable gold or silver pieces, regular tarnish prevention tips will maintain their luster. And always, always remove your layers before showering or swimming to avoid soap scum and accelerated wear, especially on delicate gold plating.
Frequently Asked Questions
How many necklaces is too many to layer?
For daytime, three is the sweet spot. You can build to five for evening drama, but more than that almost always looks overdone and feels cumbersome. The goal is curation, not coverage.
Can I layer a pendant with a lariat?
Absolutely, and it’s a classic combination. Use the pendant as your anchor piece. Choose a lariat that’s significantly longer (24+ inches) and lighter in visual weight. The different shapes and the lariat’s movable ends create beautiful, dynamic interest.
My layered necklaces always twist. How do I fix this?
Twisting occurs when pendants are top-heavy or chains are too light. A necklace stabilizer, a small bar that clips two or three chains together at the nape of your neck, is a game-changer. It keeps everything aligned and distributes weight evenly. You can also opt for pendants that lay flat naturally.
How do I clean between the chains where they touch?
Use a very soft, clean makeup brush or a dedicated jewelry brush dipped in a mild soapy water solution. Gently work the bristles between the links to dislodge grime. Dry thoroughly with a lint-free cloth. For intricate pieces, follow our guide on silver chain maintenance.
Is it bad to sleep in layered jewelry?
Yes, I strongly advise against it. Not only does it dramatically increase the risk of tangling and breakage, but the prolonged pressure and friction can damage both the metals and any gemstones. It’s a simple habit that vastly extends the life of your pieces.
Before You Go
Layering jewelry successfully is an exercise in thoughtful editing. The three-piece formula provides a fail-safe structure, while the half-inch gap rule is your shield against daily frustration. Remember, mixing metals works when you do it with purpose, letting one color lead.
Start with what’s in your box. Lay your pieces out on a table, play with lengths and textures, and don’t be afraid to swap a clasp or add an extender. Your perfect stack should feel like a signature, balanced, personal, and effortlessly yours. For more on keeping those pieces sparkling, explore our guides on cleaning gold jewelry and costume jewelry maintenance.