
How to Wear a Men’s Bracelet with Confidence
Wear a men’s bracelet on the wrist that matches your activity: the non-dominant side for physical or desk work to avoid damage, the dominant side for visibility in social or professional settings. The fit must allow one finger to slide between the bracelet and your wrist, and for stacking, add 1 to 1.5 centimeters to your snug wrist measurement.
I still remember the first men’s bracelet that felt like mine, a simple hammered silver cuff from a local artisan. I wore it everywhere, until one afternoon working on my car, I gouged a deep scratch across its face. That was the lesson: a bracelet isn’t just an ornament; it’s part of your day, and it needs to work with your life, not against it.
Forget outdated rules about left versus right. The real guide is in your hands, your work, and the subtle feel of metal or leather against your skin. Let’s talk about how to wear one so it becomes a natural part of your look, not a costume piece you’re constantly adjusting.
Key Takeaways
- Fit is foundational. The one-finger test is non-negotiable. If two fingers slide in, the bracelet will spin; if none fit, it’s too tight.
- Stack with space. For a comfortable stack of 2-3 bracelets, add 1cm to your snug wrist measurement. For 4+, add 1.5cm.
- Leather has a lifespan. It absorbs sweat and will develop a sour smell after a few months if not kept dry and conditioned.
- Symmetry looks staged. Wear all your wrist accessories on one side for a casual, intentional look. Matching bracelets on both wrists feels costumey.
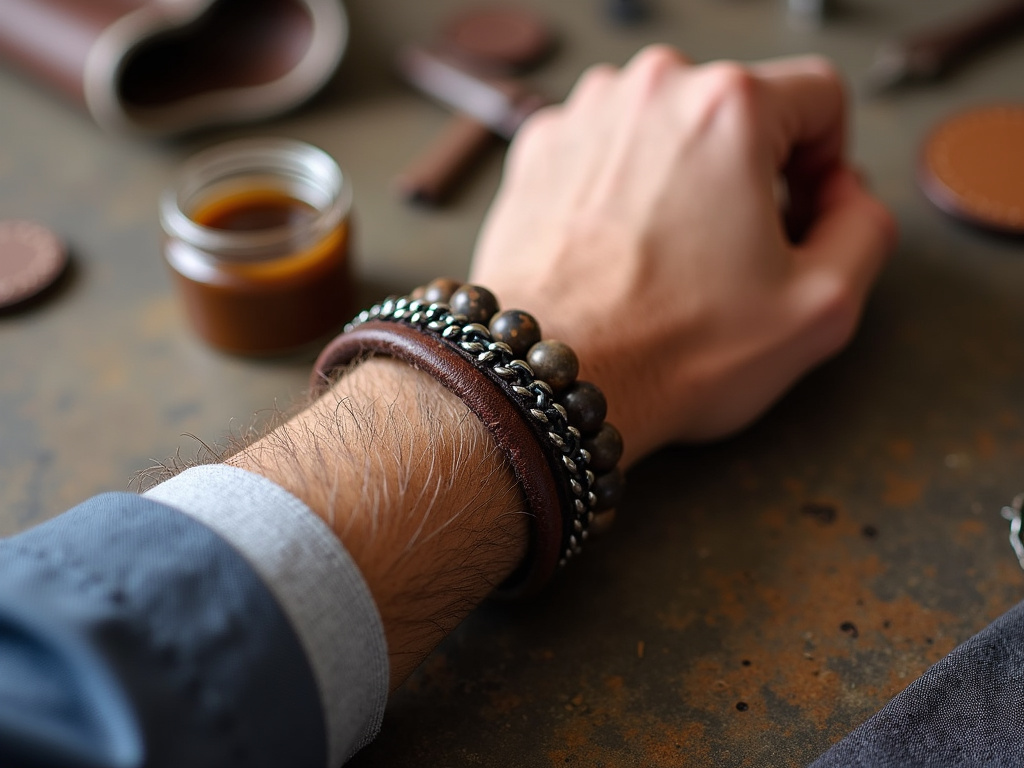
- Anchor your stack. Always place the heaviest, widest piece (like a leather cuff) closest to your hand to prevent the whole stack from sliding.
For daily wear, a men’s bracelet should be worn on the non-dominant wrist to minimize impact and snagging during physical or desk-based tasks. The fit should be snug, allowing one finger to slide between the bracelet and the wrist bone. For stacking multiple pieces, add 1 to 1.5 centimeters to the base wrist measurement.
Which Wrist Should You Wear Your Bracelet On?
The old “wear it on your non-dominant wrist” advice is a starting point, not a sacred rule. It’s pragmatic: if you’re right-handed and typing all day, a bracelet on your left wrist won’t drag across your keyboard. If you’re active, that wrist takes less impact. But I’ve learned your role can override this.
Common mistake: Blindly wearing a bracelet opposite your watch, without a gap, the two pieces will grind against each other, leaving fine but permanent scratches on both within weeks.
If your job is client-facing, you’re a creative, a consultant, a salesman, try switching to your dominant wrist. That’s the hand you gesture with, the one that gets seen in a handshake. The bracelet becomes a subtle part of your professional presentation, a conversation starter. I did this during a series of gallery openings last year, wearing a Caligio Omega chain on my right (dominant) wrist. It felt more engaged, more a part of the interaction.
Wearing it with a watch on the same wrist? Absolutely. Just leave a centimeter of skin between them. That tiny gap is a bumper, preventing the constant clink and wear.
TL;DR: Match your wrist to your task: non-dominant for protection, dominant for presence. On the same wrist as a watch, always leave a gap.
How Snug Should a Men’s Bracelet Feel?
A bracelet should feel present but never restrictive. The universal test is simple: slide your index finger between the bracelet and your wrist bone. If it fits comfortably, you’re golden. If two slide in, it’s too loose and will spin endlessly. If you can’t get one in, it’s too tight, it will annoy you and, with metals, can even leave a temporary indent.
Your wrist swells and contracts throughout the day. That one-finger gap is your buffer. For a single bracelet, most men of average build find a medium (up to 7 inches) works. Planning a stack changes the math completely.
Here’s a quick reference for getting the fit right for any scenario:
| Wearing Style | Measurement Rule | Practical Reason |
|---|---|---|
| Single Bracelet | Snug wrist + one-finger gap | Prevents spinning and allows for natural daily swelling. |
| Stack of 2-3 Bracelets | Snug wrist + 1 cm (0.4 in) | Adds room for layers to slide as a unit without pinching skin. |
| Stack of 4+ Bracelets | Snug wrist + 1.5 cm (0.6 in) | Accommodates bulk while preventing a rigid, cuff-like feel. |
| Leather Cuff | Snug wrist + half-finger gap | Leather stretches and forms; starting slightly tighter accounts for future give. |
What’s the Right Way to Stack Bracelets?
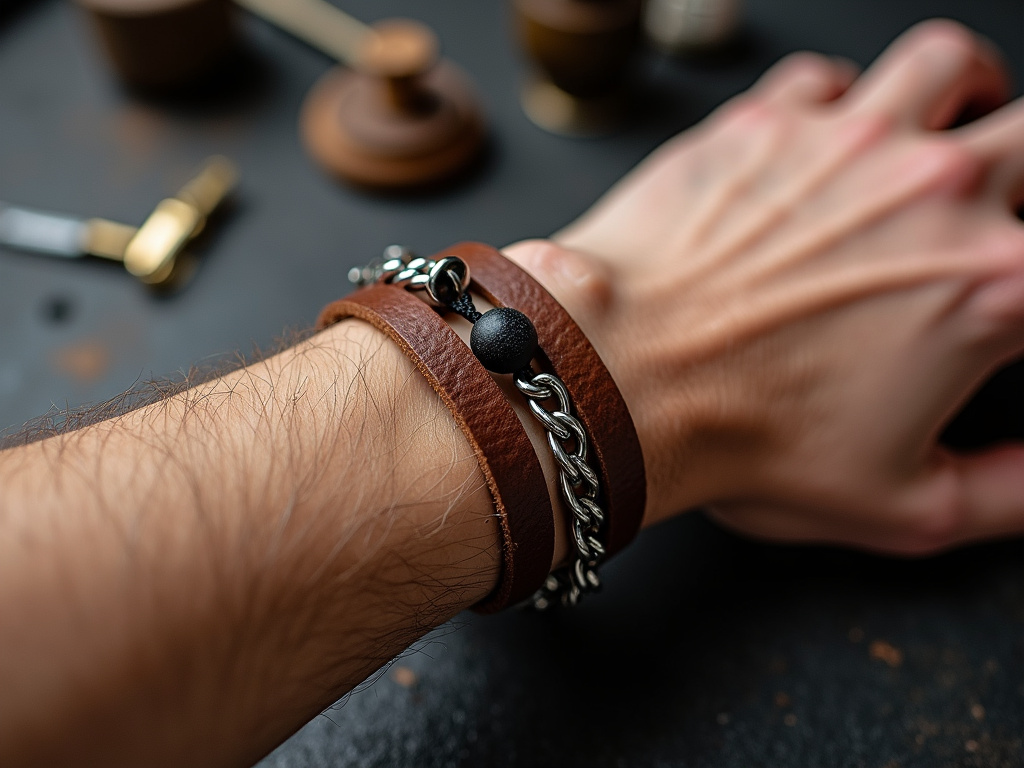
Stacking is about friction, weight, and sound. You want a soft clink, not a jarring clank. Start with your base wrist measurement. For a stack of three, add that full centimeter. Here’s why: a 5mm silver curb chain, a beaten leather band, and a single matte lava bead don’t just look good together; they move independently. The leather warms against your skin, the chain stays cool. That’s the feel you’re after.
I ruined a beautiful braided leather bracelet by stacking it with an identical one. They fused into one thick, rolling unit, and the constant friction wore the vegetable-tanned finish off the underside of both in under a month. Now, I never layer the same material directly together.
Forget matching sets. Follow this order to build a stack that lays flat and stays put:
1. Anchor with the heaviest piece closest to your hand. A wide leather cuff or a thick chain acts as a dam. If you put a delicate piece here, your entire stack will slide forward over your knuckles every time you gesture.
2. Add a medium-weight piece. A 6mm Figaro chain or a thinner leather band creates a graduated profile. Skipping to another heavy piece makes the stack feel like a rigid, uncomfortable cuff.
3. Finish with the lightest piece highest on your wrist. A thin cord or beaded bracelet goes here. This top layer gets the least abrasion. Putting a delicate beaded piece at the bottom guarantees the cord will fray against your desk.
When your stack comes off, proper jewelry storage in a divided box is non-negotiable to prevent tangles and scratches.
How Do You Choose Durable Bracelet Materials?
Your material choice dictates care, lifespan, and potential headaches. Generic advice fails here; you need to know the named failure points.
Leather bracelets develop a prized patina but have a critical flaw: they’re sponges. Sweat and water soak in, and a damp bracelet will develop a persistent sour smell within months. I learned this on a summer road trip, my favorite Horween leather cuff from Corter Leather smelled like a wet dog for weeks. I had to soak it in a vinegar solution to kill the bacteria. Now, I use a pea-sized amount of Leather Honey Conditioner every six months to prevent the cracking I’ve seen with cheaper products.
Beaded bracelets fail at the cord. The cheap, single-strand elastic in many affordable beads will snap with a sudden reach. Instead, seek out brands like Miansai that use silicone-coated, multi-strand core threads, or pieces with a 0.8mm stainless steel wire core for near-indestructibility.
Metal chains are workhorses, but width is key. As noted in TheCaratCut’s guide, the sweet spot for daily wear is 5mm-6mm. Anything over 8mm starts to feel heavy and look flashy. And forget the old “don’t mix metals” rule. A polished silver bracelet with a gold watch works if the finishes are similarly refined.
This table breaks down what to expect from common materials:
| Material | Best For | Primary Failure Mode | Essential Care |
|---|---|---|---|
| Leather | Casual wear, developing patina | Absorbs moisture, smells after 2-3 months; cracks if dried out. | Keep dry. Condition every 6 months with a quality leather conditioner. |
| Beaded (Elastic Cord) | Adding color & texture | Elastic cord snaps under sudden tension, scattering beads. | Check cord tension monthly. Opt for braided or metal-core cords. |
| Sterling Silver | Office, refined looks | Tarnishes from skin oils and air exposure. Prone to fine scratches. | Weekly wipe with a microfiber cloth. Use a dedicated silver jewelry maintenance polish bi-annually. |
| Stainless Steel | Active lifestyles, water | Highly durable but can show water spots and skin oil film. | Regular cleaning stainless steel jewelry with mild soap keeps it bright. |
| Copper | Statement, earthy style | Develops a green verdigris patina and can oxidize skin. | Requires specific copper bracelet maintenance to manage patina and clean skin contact points. |
What Are the Pro Tips for Putting On and Caring for Bracelets?
Putting on a clasp-heavy chain by yourself is a universal frustration. The tape trick from a popular YouTube tutorial is genius. Tape one end of the bracelet flat against your skin where you want it to sit (avoiding hair!), freeing both hands to easily fasten the clasp. It’s a thirty-second hack that saves minutes of fumbling.
Care is material-specific, but universal rules exist. Always remove bracelets before applying lotion, sunscreen, or hair product. The chemicals create a dulling film on metal and degrade leather.
Before you start: Chemicals in lotions and hair products can create a permanent, dulling film on metal and degrade leather finishes. Always put your bracelet on last when getting dressed and take it off first to avoid snags and chemical exposure.
A simple routine bracelet cleaning habit preserves everything. For metals, a weekly wipe with a microfiber cloth removes skin oils. For deeper cleans, use the appropriate method: cleaning gold jewelry requires a gentler touch than cleaning stainless steel jewelry. For pieces that have already dulled, tarnish removal methods can often restore their shine.
Store each piece separately. A tangled drawer of chains is a scratch factory. This is critical for gemstone bracelet cleaning and maintenance, as stones can be scratched by harder metals. For plated fashion pieces, costume bracelet care means avoiding moisture and chemicals to preserve the finish.
Frequently Asked Questions
Do men wear bracelets on the left or right?
It’s activity-dependent. Choose your non-dominant wrist (left for right-handers) for physical or desk work to prevent damage and snagging. Switch to your dominant wrist in social or client-facing settings where you want the piece to be more visible as you gesture and interact.
How many bracelets should a man wear?
One to three bracelets on a single wrist is the standard, effective range. One statement piece is often enough. A stack of two or three works if you vary materials and weights. Going beyond four often looks bulky and can feel restrictive.
Can you wear a bracelet and a watch on the same wrist?
Yes, but leave a small gap, about a centimeter of skin, between them. This prevents constant clashing and scratches. Ensure the combined bulk doesn’t make the fit too tight on your wrist.
What is the rule for mixing metals on bracelets?
The old rule is outdated. It’s now acceptable to mix gold and silver tones. Focus instead on matching the finish: pair polished pieces with polished, and matte with matte, for a cohesive look.
How do you keep bracelets from falling off?
proper fit is your first defense. Use the one-finger rule. For bracelets with loose clasps, a jeweler can often adjust the closure for a tighter hold. Avoid wearing overly loose bracelets, especially with stiff shirt cuffs that can catch and pull them off.
Can you shower with a men’s bracelet?
It depends on the material. Never shower with leather or beaded bracelets with elastic cords. Solid metals like stainless steel or solid gold can handle it, but soap scum buildup is a nuisance, and the risk of dropping it down the drain is real. It’s always safer to take them off.
Before You Go
Wearing a bracelet well isn’t about following rigid mandates. It’s about intentional choices: placing it on the wrist that suits your day, measuring for a fit that forgets it’s there, and combining materials that tell a story without shouting.
Remember that leather needs to breathe, beads need strong cords, and metals need a soft cloth. Let your pieces live on one side, mix textures with confidence, and care for them so they last. The goal is subtlety, a detail that feels uniquely yours, not a costume you have to explain.